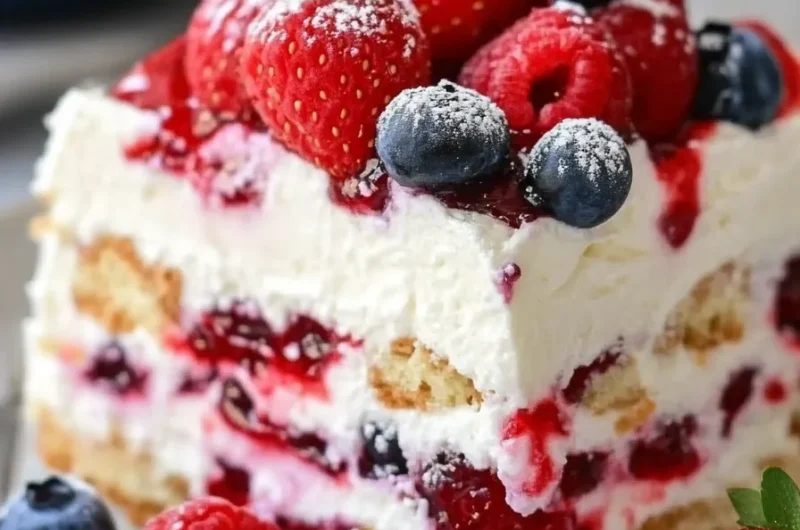
No Bake Summer Berry Icebox Cake is one of the most refreshing and satisfying desserts you’ll ever encounter. Perfect for hot summer days, this cake captures the essence of seasonal berries, creamy layers, and a no-fuss approach to dessert making. There’s something wonderfully indulgent about a dessert that requires no baking and can be ready in just a few hours. This cake delivers an extraordinary flavor experience, making it a delightful centerpiece for any summer gathering, from family picnics to elegant dinner parties.
Imagine biting into a slice of this amazing cake, greeted by the explosion of freshness from ripe berries, the rich creaminess of whipped cream, and the delightful crunch of graham crackers. Each bite envelops your palate with layers of flavor that evoke the essence of summer. This recipe is not only easy to prepare but it also allows the vibrant colors and textures of fresh berries to shine through.
In this article, you will discover the reasons you’ll love this recipe, how to prepare it, the ingredients needed, step-by-step instructions, and the best ways to serve this delightful dessert. So, let’s dive right into the wonderful world of No Bake Summer Berry Icebox Cake!
Why You’ll Love This Recipe
No Bake Summer Berry Icebox Cake will quickly become a favorite in your household. Here are several reasons this dessert will capture your heart:
1. Quick and Easy: The entire process requires minimal time and effort, perfect for busy summer days.
2. Fresh Ingredients: Utilizing seasonal berries means you get an infusion of vibrant flavors and nutritional benefits.
3. No Baking Required: With no need for an oven, it’s great for those hot days when you want to avoid heating up your kitchen.
4. Versatile: You can easily customize this cake with your favorite berries or even add different flavors of whipped cream.
5. Impressive Presentation: This cake looks stunning when sliced, showcasing the beautiful layers of berries and cream.
6. Crowd-Pleaser: Its light, refreshing taste makes it a perfect dessert for gatherings and special occasions.
By choosing this recipe, you ensure a delightful addition to any summer festivity, capturing the season’s best flavors in each delightful bite.
Preparation and Cooking Time
Preparing No Bake Summer Berry Icebox Cake is surprisingly simple and will take about 4 hours in total, most of which is waiting time for the cake to set. Here’s the breakdown:
– Preparation Time: 30 minutes
– Chilling Time: 3.5 hours
These timing estimates can vary slightly based on your kitchen setup and how quickly you work. However, you can rest assured that this cake will be worth the wait!
Ingredients
– 2 cups heavy whipping cream
– ½ cup powdered sugar
– 2 teaspoons vanilla extract
– 1 ½ cups graham cracker crumbs
– 2 cups mixed fresh berries (strawberries, blueberries, raspberries)
– Zest of 1 lemon (optional)
– Fresh mint leaves (for garnish, optional)
Step-by-Step Instructions
Creating No Bake Summer Berry Icebox Cake can be both fun and easy. Just follow these straightforward steps:
1. Whip the Cream: In a large mixing bowl, use an electric mixer to whip the heavy cream until it begins to thicken. Add the powdered sugar and vanilla extract, continuing to beat until soft peaks form.
2. Prepare the Biscuit Layer: In a separate bowl, combine graham cracker crumbs with a little melted butter if desired. Lay down a single layer of crumbs at the bottom of a 9×13 inch baking dish.
3. Add Cream Layer: Spread half of the whipped cream mixture evenly over the graham cracker crumbs, ensuring smooth coverage.
4. Layer the Berries: Distribute half of the mixed berries over the whipped cream layer, adding more for color and flavor.
5. Repeat Layers: Create another layer of graham cracker crumbs, followed by the remaining whipped cream and then the rest of the berries on top.
6. Chill the Cake: Cover the dish with plastic wrap or aluminum foil and place it in the refrigerator. Allow it to chill for at least 3.5 hours or until set.
7. Garnish Before Serving: If using lemon zest or mint leaves, add them just before slicing for an extra pop of flavor and appeal.
8. Serve Chilled: Slice the cake into squares and serve immediately. Enjoy the delightful layers and refreshing taste!
How to Serve
When it comes to serving No Bake Summer Berry Icebox Cake, consider the following tips for a delightful presentation:
1. Plating: Place a slice on a decorative plate. The colorful layers will add an eye-catching element to your dessert table.
2. Garnishments: Add fresh mint leaves on top for a touch of color and freshness. A sprinkle of additional lemon zest can also enhance the visual appeal.
3. Beverage Pairing: This cake is delightful when served with iced tea, lemonade, or even a glass of sparkling wine, making it perfect for summer gatherings.
4. Accompanying Options: To elevate the dessert experience, offer a side of extra whipped cream or serve alongside a scoop of vanilla or lemon sorbet.
5. Leftovers: If there happens to be any leftover cake (which is unlikely), store it in the refrigerator, covered tightly. Enjoy it again the next day as it develops even more flavor!
By taking these serving tips into account, you ensure that every piece of No Bake Summer Berry Icebox Cake is not just a dessert, but an enjoyable experience for you and your guests. With its impressive appearance and refreshing taste, this dessert is sure to be a highlight of your summer gatherings!
Additional Tips
– Experiment with Berries: While mixed berries are delightful, try using other favorites like peaches or apricots to create new flavor profiles.
– Layering Strategy: For neater slices, use a small offset spatula to help lift the layers when serving.
– Plan Ahead: Prepare the cake a day before your event. This allows the flavors to meld and enhances the overall taste.
– Consider Color: Add in berries of various colors to create a visually striking dessert that will impress your guests.
Recipe Variation
Feel free to explore different spins on this classic treat. Here are some variations you might enjoy:
1. Chocolate Drizzle: Melt dark chocolate and drizzle it over the top for a rich contrast to the fresh berries.
2. Coconut Flavor: Mix some shredded coconut into the whipped cream for an added tropical note that pairs well with the berries.
3. Nutty Crunch: Incorporate crushed nuts such as almonds or hazelnuts between layers for a delightful crunch.
4. Citrus Twists: Add orange or lime zest to the whipped cream for a tart and refreshing citrus flavor.
Freezing and Storage
– Storage: Store any leftover cake in the refrigerator. Ensure it’s covered tightly with plastic wrap or aluminum foil. It will maintain its quality for 3-5 days.
– Freezing: You can freeze the cake by wrapping individual slices in plastic wrap and then placing them in a freezer-safe bag. It should stay fresh for up to 2 months. Thaw in the refrigerator for a few hours before serving again.
Special Equipment
To prepare No Bake Summer Berry Icebox Cake, you will need the following tools:
– Mixing bowls (various sizes)
– Electric mixer or whisk
– Measuring cups and spoons
– 9×13 inch baking dish
– Plastic wrap or aluminum foil for chilling
Frequently Asked Questions
Can I use frozen berries?
Although fresh berries are ideal, you can use frozen ones. Just make sure to thaw and drain them thoroughly before adding them to prevent excess moisture.
How long can I keep the cake in the fridge?
The cake is best enjoyed within 3 to 5 days, but it can last up to a week when stored properly.
Is it necessary to use heavy cream?
Heavy cream results in a rich and stable whipped cream layer. However, you can use a lighter cream, but the texture will be less creamy.
Can I make this gluten-free?
Yes! Substitute graham cracker crumbs with gluten-free alternatives available in stores or make your own using gluten-free cookies.
What can I serve with the cake?
This cake pairs well with a scoop of vanilla ice cream or a dollop of extra whipped cream on the side.
Conclusion
No Bake Summer Berry Icebox Cake is not just a dessert; it’s an experience that captures the essence of summer. Its simplicity, freshness, and stunning presentation make it a go-to recipe for any summer gathering. As you share it with family and friends, each bite will spark joy and fond memories. Enjoy the delightful flavors of this cake and make it a staple for your warm-weather festivities!

No Bake Summer Berry Icebox Cake: An Incredible Ultimate Recipe for 2023
- Total Time: 15 minutes
Ingredients
– 2 cups heavy whipping cream
– ½ cup powdered sugar
– 2 teaspoons vanilla extract
– 1 ½ cups graham cracker crumbs
– 2 cups mixed fresh berries (strawberries, blueberries, raspberries)
– Zest of 1 lemon (optional)
– Fresh mint leaves (for garnish, optional)
Instructions
Creating No Bake Summer Berry Icebox Cake can be both fun and easy. Just follow these straightforward steps:
1. Whip the Cream: In a large mixing bowl, use an electric mixer to whip the heavy cream until it begins to thicken. Add the powdered sugar and vanilla extract, continuing to beat until soft peaks form.
2. Prepare the Biscuit Layer: In a separate bowl, combine graham cracker crumbs with a little melted butter if desired. Lay down a single layer of crumbs at the bottom of a 9×13 inch baking dish.
3. Add Cream Layer: Spread half of the whipped cream mixture evenly over the graham cracker crumbs, ensuring smooth coverage.
4. Layer the Berries: Distribute half of the mixed berries over the whipped cream layer, adding more for color and flavor.
5. Repeat Layers: Create another layer of graham cracker crumbs, followed by the remaining whipped cream and then the rest of the berries on top.
6. Chill the Cake: Cover the dish with plastic wrap or aluminum foil and place it in the refrigerator. Allow it to chill for at least 3.5 hours or until set.
7. Garnish Before Serving: If using lemon zest or mint leaves, add them just before slicing for an extra pop of flavor and appeal.
8. Serve Chilled: Slice the cake into squares and serve immediately. Enjoy the delightful layers and refreshing taste!
- Prep Time: 15 minutes
- Cook Time: 0 minutes
Nutrition
- Serving Size: 12 servings
- Calories: 250 kcal
- Fat: 15g
- Protein: 2g